Difficulty: 1/5
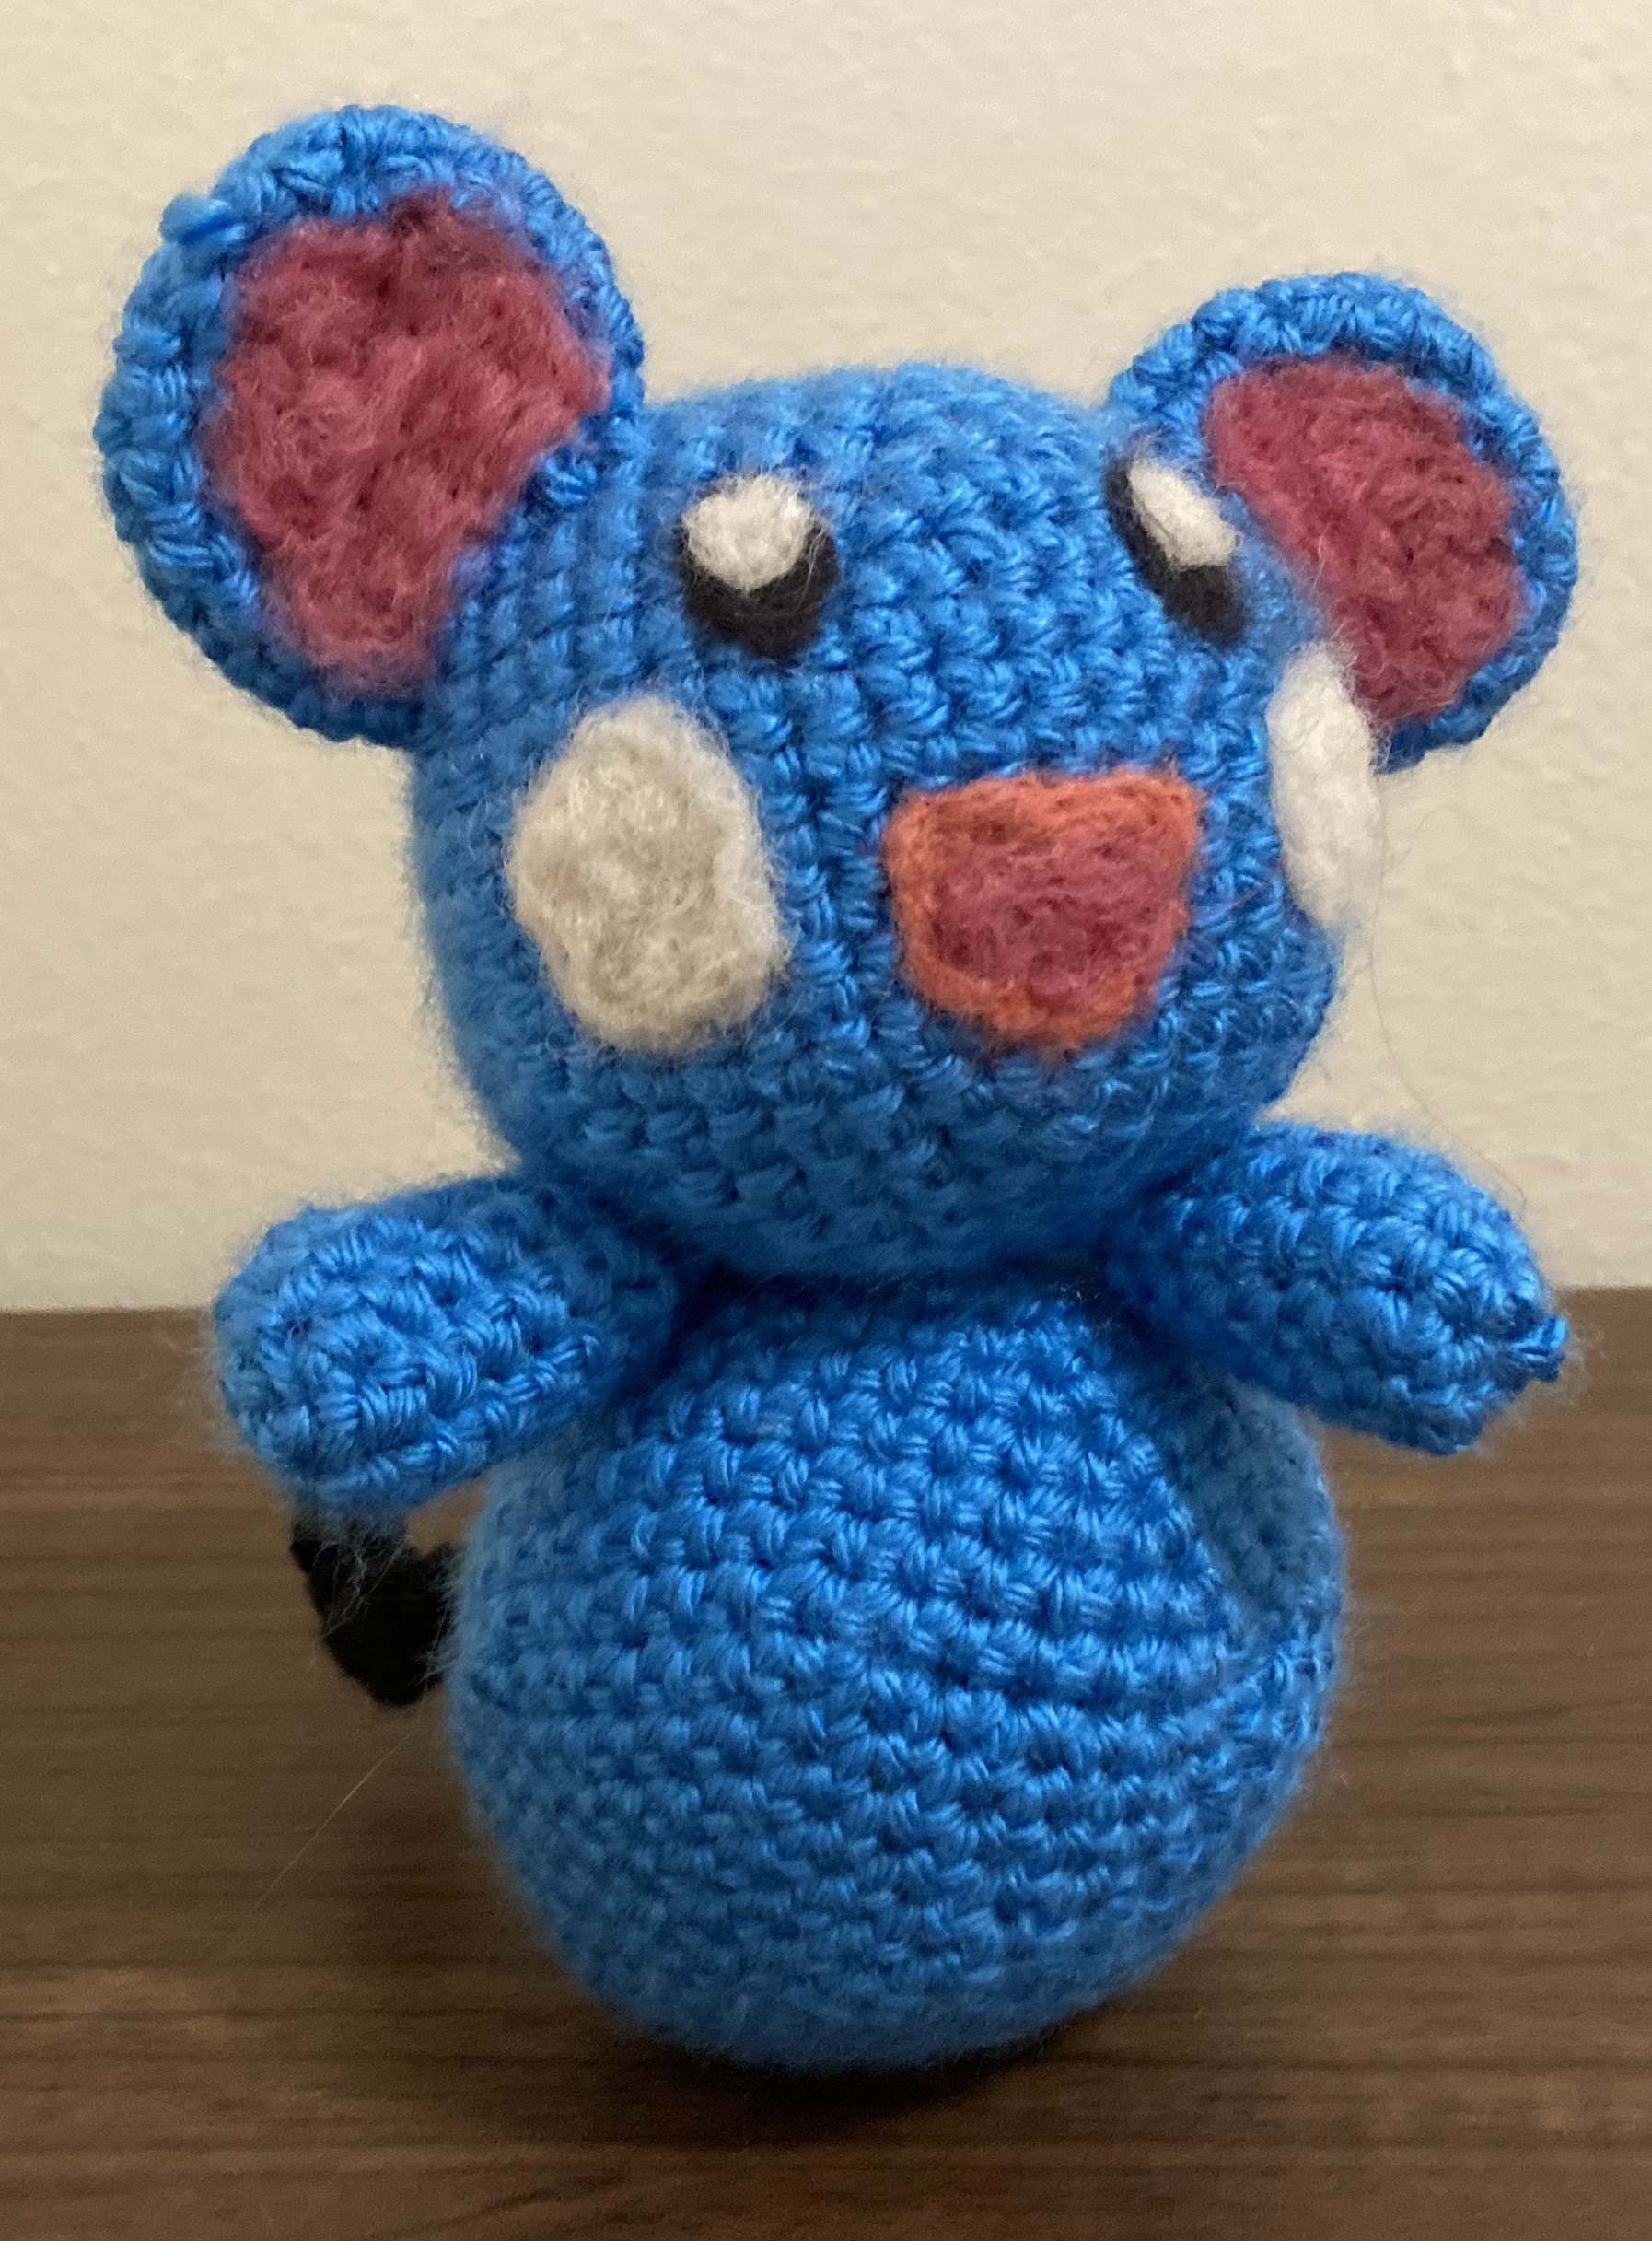
This little cutie was a Valentine's Day request from my husband this year! This is a cute and simple pattern that can be made up in a day or two. I used a chevron stitch, which is used to add zig-zag textures in crochet, to add a bit of a curl to the tail. I'm really happy with how it came out, and so is he!
Materials
-Yarn. Use a worsted weight in a material of your choice. I use acrylic for my doll patterns due to its firm weave, which provides the doll with some structure. You can use
For regular Azurill: (A) ~100m of cobalt blue, (B) ~2m of black
For a shiny Azurill: (A) ~100m of mint green, (B) ~2m of black
-4.5 mm (size 7) crochet hook
-Fiberfill or crafting scraps for stuffing
-Yarn needle
-Pins
-Scraps of yarn for round markers
-Scraps of felt or fabric for details such as eyes. I use needle felting for this, but you can also cut out pieces of fabric if you prefer.
Gauge: Gauge is not important for this work. With the given yarn and hook size, the finished doll will stand about 3 inches (7.6 cm) in height; adjust yarn and/or hook size if a bigger or smaller doll is desired. Just make sure your stitches are of a consistent size and tightness.
Notation (US crochet)
ch: chain
st: stitch
sc: single crochet
hdc: half-double crochet
slst: slip stitch
inc: increase stitch (perform 2 sc in the next stitch)
dec: decrease stitch (insert hook into next stitch, yarn over and pull through the stitch. Insert hook into next stitch, yarn over and pull through first loop. Yarn over again, pull through all 3 loops on hook.)
Pattern
Body (Make 1)
Round 1: With A, 6 sc in starter circle (6)
Round 2: 2 sc in each st around. (12)
Round 3: *sc in next st, inc.* Repeat from * to * around. (18)
Round 4: *sc in next 2 st, inc.* Repeat from * to * around. (24)
Round 5: *sc in next 3 st, inc.* Repeat from * to * around. (30)
Round 6: *sc in next 4 st, inc.* Repeat from * to * around. (36)
Round 7: *sc in next 5 st, inc.* Repeat from * to * around. (42)
Rounds 8-13: sc around (42)
Round 14: *sc in next 5 st, dec.* Repeat from * to * around. (36)
Round 15: *sc in next 4 st, dec.* Repeat from * to * around. (30)
Round 16: *sc in next 3 st, dec.* Repeat from * to * around. (24)
Round 17: *sc in next 2 st, dec.* Repeat from * to * around. (18) Begin stuffing, and continue to do so until finished.
Round 18: *sc in next st, dec.* Repeat from * to * around. (12)
Round 19: dec around (6)
Round 20: continue to dec until closed. Tie off and weave in loose ends.
Ears (Make 2)
Round 1: With A, 6 sc in starter circle (6)
Round 2: 2 sc in each st around (12)
Round 3: *sc in next st, inc.* Repeat from * to * around. (18)
Rounds 4-6: sc around (18)
Round 7: *sc in next st, dec.* Repeat from * to * around. (12)
Round 8: dec around (6)
Feet (Make 2)
Round 1: With A, 5 sc in starter circle (5)
Round 2: 2 sc in each st around (10)
Rounds 3-7: sc around (10) Add a small amount of stuffing at the end of row 7.
Round 8: dec around (5)
Round 9: dec around until closed.
Tail (Make 1)
Round 1: With A, 6 sc in starter circle (6)
Round 2: 2 sc in each st around. (12)
Round 3: *sc in next st, inc.* Repeat from * to * around. (18)
Round 4: *sc in next 2 st, inc.* Repeat from * to * around. (24)
Round 5: *sc in next 3 st, inc.* Repeat from * to * around. (30)
Round 6: *sc in next 4 st, inc.* Repeat from * to * around. (36)
Round 7: *sc in next 5 st, inc.* Repeat from * to * around. (42)
Rounds 8-13: sc around (42)
Round 14: *sc in next 5 st, dec.* Repeat from * to * around. (36)
Round 15: *sc in next 4 st, dec.* Repeat from * to * around. (30)
Round 16: *sc in next 3 st, dec.* Repeat from * to * around. (24)
Round 17: *sc in next 2 st, dec.* Repeat from * to * around. (18) Begin stuffing, and continue to do so until finished.
Round 18: *sc in next st, dec.* Repeat from * to * around. (12)
Round 19: dec around (6)
Round 20: continue to dec until closed. Switch color to B in final stitch.
****Switch to working in rows****
Row 1: ch 40, turn. (40)
Row 2: sc in the first 4 ch, starting in 2nd ch from hook. *inc. sc in next 4 st. dec. sc in next 4 st.* Repeat from * to * until the end of the row. Secure the tail rows by finishing off with a sl st under where they connect to the ball. Finish off and weave in ends.
Tail connection (Make 1)
Round 1: With A, 5 sc in starter circle (5)
Round 2: 2 sc in each st around. (10)
Round 3: *sc in next st, inc.* Repeat from * to * around. (15)
Round 4: *sc in next 2 st, inc.* Repeat from * to * around. (20)
Round 5 sc around (20). Finish and tie off, leaving tail.
Assembly

Step 1: Sew the ears and feet to the body. If you want the body to be able to balance on top of the tail, attach the feet at an angle as shown. Weave in loose ends.
Step 2: Sew the loose end of the tail to the tail connection piece. Sew the tail connection piece to the body, adding small amount of stuffing under the connection piece as you go. Weave in loose ends.


Step 3: Add the ear and face details (eyes, mouth, and blush marks) using the method of your choice. I use needle felting to finish my dolls, but you can also cut the details out from fabric and sew them on, if you prefer.


No comments:
Post a Comment